

How to Connect Your Car to a Caravan Hitch: A Step-by-Step Guide for UK Caravanners
- Caravan Coach
- Feb 11, 2025
- 7 min read
Updated: Aug 4, 2025
Connecting your car to a caravan hitch might seem intimidating for beginners, but with the right preparation and a clear process, it can be a straightforward and safe procedure. In this guide, we’ll take you through each step—from pre-checks to final inspections—using an ALKO stabilised hitch with an anti-snake device and a motor mover for precise positioning. Follow these detailed instructions to ensure a secure and confident hitching process every time.

Guide to Caravanning: Hitching up
Pre-Checks
Before you begin the hitching process, safety and preparation are paramount. Take the following pre-checks to ensure everything is in order:
Assess the Environment: Ensure that the ground is level and free of obstructions. Check that there is ample space on both sides of your caravan and towing vehicle.
Inspect Your Equipment: Verify that your ALKO stabilised hitch, anti-snake device, and motor mover are in good working condition. Look for any signs of wear or damage.
Confirm Towing Readiness: Ensure that your car and caravan are within the recommended weight limits. Make sure that all necessary documentation and the vehicle’s manual are handy.
Communicate: If you’re working with a passenger or helper, explain the process so that everyone is aware of their role and the next steps.
Readying the Caravan
Proper preparation of your caravan is essential for safety and ease during the hitching process. Follow these steps to ready your caravan:
Secure Loads: Ensure that any loads within the caravan are firmly secured. This prevents items from shifting, which could upset the balance during towing.
Disconnect Water and Electric Supplies: Detach any water hoses and electrical cables to prevent accidental damage or interference during the hitching process.
Empty the Toilet: For hygiene and weight considerations, empty the caravan toilet.
Drain Down the Boiler Circuit: If your caravan has a boiler, drain it to avoid any potential issues or damage.
Turn Off the Gas: To avoid any hazards, switch off the gas supply before starting the hitching process.
Raise the Stabiliser Legs: Stow all legs in their up right transit position to allow the caravan to be moved.

Taking these steps will help prevent damage and ensure that all systems are in a safe state for hitching.
Positioning the Car
The first physical step in the process is correctly positioning your car:
Park Safely: Position your towing vehicle on a flat, stable surface. Engage the handbrake to prevent any accidental movement.
Vehicle alignment: Ensure your vehicle is positioned for a safe departure, avoiding tight angles or obstructions.
Check Clearance: Allow at least two meters clearance to allow the caravan to be driven straight for the final metre. This aligns the jockey wheel transit tabs, ensuring it can be fully raised when hitching. Parking too close, especially if not directly in front of the caravan, can prevent this alignment from being possible, which will complicate the hitching process.
Engaging the Motor Mover
A motor mover is an invaluable tool for aligning your caravan with your towing vehicle. Follow these steps to properly engage your moto mover:
Engage the Drive Rollers: Activate the motor mover’s drive rollers to prepare for precise movement.

Energise the Electrics: Insert the motor mover isolator key to provide power to the system. This is usually located in the caravans battery box compartment.

Adjust the Jockey Wheel: Make sure that the jockey wheel is adjusted so that it is not over extended. Trying to manoeuvre the caravan over rough terrain, such as shingle, with the jockey wheel fully extended may cause damage to the post or the clamp.
Activate the Remote: Its common that you must push two on buttons simultaneously to activate the remote. If you are unsure how to do this for your device check your models operating manual.

Release the Park Brake: Once everything is set, release the park brake on the motor mover. This step will enable you to start moving the caravan into position.
Moving the Caravan into Position
With the moto mover engaged, carefully manoeuvre your caravan into the correct position for hitching:
Moving Off: Slowly drive the caravan towards your car, ensuring that the hitch and tow ball are lined up perfectly. Use the motor mover to make fine adjustments as needed.
Lining Up: Try and travel straight for the last meter. This will ensure the jockey wheel transit tabs are aligned, allowing the jockey wheel to be fully raised when you come to hitch.
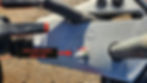
Final Approach: Raise the height of the caravan hitch so it can easily pass over the tow ball, making minor positional adjustments as necessary. The hitch should come to rest directly over the tow ball, imagine a line through the hitch head to aid your judgment.
Connecting the Caravan
Now comes the critical part of the process: connecting the caravan to your car. Follow these precise steps:
Align with the Tow Ball: Confirm that the caravan’s hitch is directly in line with the tow ball on your car. Imagine a line through the hitch to help to visualise the relative positions.

Vehicle Positioning - The Two Arrows Need to Align Open the Hitch: Activate the mechanism to open the hitch, preparing it to receive the tow ball.
Lower onto the Tow Ball: Carefully lower the hitch onto the tow ball. Ensure that this is done slowly to avoid any misalignment.
Check the Hitch Indicator: Most modern ALKO hitches come with an indicator. Verify that this indicator shows a secure connection - Green segment exposed.

Test Positive Engagement: To be absolutely sure, lift the back of the car slightly using the jockey wheel. This test confirms that the hitch has engaged positively and is securely locked onto the tow ball.
Engage the hitch stabiliser: Close the lever of the hitch stabiliser mechanism, so a firm grip is made on the tow ball.

Engaging the Hitch Stabiliser Lift the Jockey Wheel into Transit Position: Once you are confident that the connection is secure, lift the jockey wheel and lock it into its transit position. If the jockey wheel arm is not secured by the locating cut-outs, the wheel can spin while in transit and unwind itself.

Jockey Wheel Connect the Breakaway Cable: Attach the breakaway cable to the designated attachment point on your tow bar, ensuring it is clipped securely using the carabiner or looped correctly if no dedicated point is available. The cable should have enough slack to allow full turning movement without pulling tight, but it must not drag on the ground or risk snagging. A correctly connected breakaway cable ensures that if the caravan detaches from the tow ball, the handbrake will engage automatically, bringing the caravan to a controlled stop for added safety.
Connect the Tow Electrics Connector: Ensure that the tow electrics are correctly connected. This will allow the caravan’s lights and other electronic systems to function in unison with your towing vehicle. If the cable is tool long, add twists in the cable to prevent it from trailing on the floor.

Connecting the Tow Electrics Check the Anti-Snaking Device: Finally, inspect the anti-snake device and its indicator. This feature is designed to prevent the caravan from swaying or “snaking” during transit, thereby enhancing stability and safety. When the tow electrics are connected the Anti-snaking device will perform a quick system check, applying the brakes and releasing. The system test is clearly audible, so its easy to identify if the system is operational, once complete the light will indicate the systems status.
Checking the Anti Brake System
AL‑KO ATC LED Indicator Status Table
LED Status | Meaning | Action |
Flashing Green | System is performing its self-test when 12V power is applied | Wait until the light goes steady |
Solid Green | System is active and fully operational | Safe to tow |
Solid Red | ATC fault detected — system is not operational | Towing possible, but ATC disabled |
Flashing Red | Serious fault detected — possible erratic behaviour | Do not tow; service required |
No Light (Dark) | No power or system/LED failure | Check power supply and connections |
Motor Mover Disengagement
Once the caravan is securely hitched, it's essential to properly disengage the motor mover to prevent unnecessary wear or damage. Follow these steps to safely deactivate the system:
Turn off the remote: Press the off button on the remote to preserve the battery and store in a safe place.
Isolate the electrical system: Remove the isolator key from the isolator to de-energise the system.
Disengage the Drive Rollers: Release the drive rollers from the caravan wheels. Failure to do so will cause severe damage to the motor mover system and the tyres of the caravan. Check there is a visible gap between the drive roller and caravan wheel.

Final Safety Checks
Before setting off, conduct a thorough series of safety checks to ensure everything is secure and roadworthy:
Re-check the Hitch Connection: The hitch indicator should show a positive engagement. Check all levers are in their correct locked position.
Inspect the Breakaway Cable: Ensure the breakaway cable is correctly attached and has the proper amount of slack.
Tow Electrics: Check that the tow electrics are firmly connected and that all necessary lights (indicators, brake lights, side lights) are functioning. Enlist a second person to help you perform the checks.

Verify the Anti-Snake Device: Check that the ALKO stabiliser and anti-snake device are engaged and that their indicators confirm correct operation.
Check the Stabiliser Legs: Double-check that all stabiliser legs are fully retracted to avoid dragging or damage while towing.
Tyre Pressure and Load Security: Confirm that the caravan tyres are correctly inflated and that all interior and exterior loads are securely fastened to prevent shifting during transit.
On-Road Preparations: Walk around the vehicle and caravan one final time, ensuring all windows, doors, and vents are closed, the gas supply is turned off, and the towing mirrors are correctly adjusted for optimal visibility.
Conclusion
Connecting your car to a caravan hitch using an ALKO stabilised hitch with an anti-snake device and a motor mover may seem like a daunting task for beginners, but by following these detailed steps, you can complete the process safely and efficiently. Always remember to perform thorough pre-checks, carefully prepare your caravan, and methodically engage the motor mover and hitching mechanisms. With these procedures in place, you can enjoy a secure connection and a worry-free journey on the roads of the UK.
For more tips and guides on UK caravanning, stay tuned to Caravan Coach, and happy towing!
Disclaimer
The information provided on this website is intended for general knowledge and informational purposes only. It does not constitute professional advice of any kind, including financial, legal, or medical advice. The author makes no representations or warranties as to the accuracy, completeness, or reliability of the content.
You should consult with a qualified professional before making any decisions based on the information presented here. The author is not liable for any damages, injuries or losses arising from the use or reliance on this website or its content.
External links are provided as a convenience and do not necessarily reflect the author's views or opinions. The author is not responsible for the content of external websites.


